
The wings for this Dragon Gourd Birdhouse were made out of a kind of fusible polymer film that is similar to shrink wrap.
Artists have been making wings wings for one-of-a-kind (OOAK) miniature fairies for years. I just applied an established idea to a different craft.
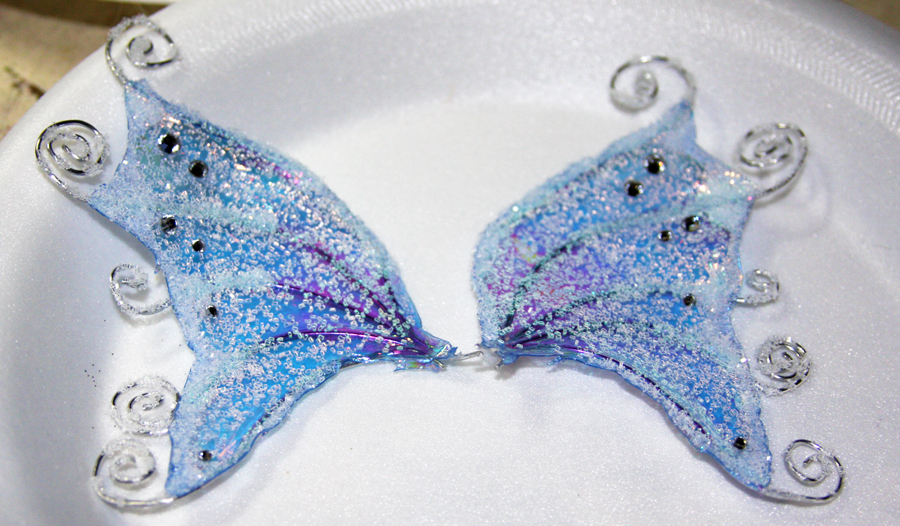
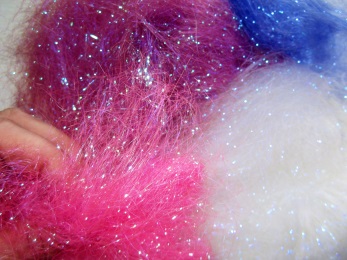
For example, I made this pair of wings for an Ice Fairy. The completed wings were embellished with crystals and glitter.
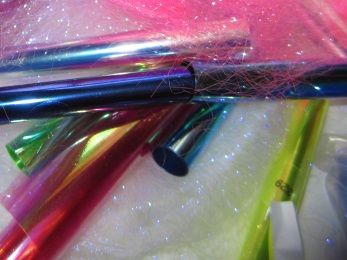
The rolls of fusible film are sold under different names, such as Textiva, Angelina Film, or Fantasy Film. The suppliers I've used usually use the name Fantasy Film. If you aren't sure it is the right kind of film, ask the seller!
You can also purchase Fantasy Film that has been shredded into fiber. The shredded fiber is called either Angelina or Crystalina, and they both come in the same iridescent colors as Fantasy Film. Angelina is finer and shorter than Crystalina: Crystalina is cut wider and longer than Angelina.
Angelina Fiber is remarkably soft. It comes in two kinds, heat bondable and staple. For my techniques, I prefer heat bondable.
While making the dragon wings described in the following tutorial, you could scatter heat bondable Angelina between two layers of Fantasy Film before shrinking the film.
Personally, I use Angelina for making angel wings.
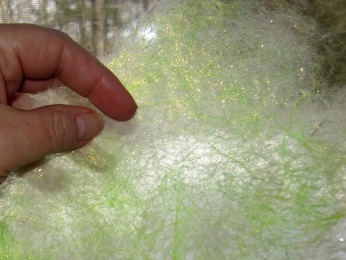
By wet felting Angelina with wool fiber, I make delicate, sparkly fabric that won't fray.
But for this tutorial, we will be using the film in rolls, not the shredded film.
To make these wings you will need Fantasy Film in your choice of colors a Ruler, Wire cutters for cutting wire, Tacky glue, cotton swabs for neatening up the glue, an Embossing heat tool, and wire. You can vary the gauge of the wire depending on the scale of your project: remember that the higher the gauge, the finer the wire. The dragon for this project was 16" tall, so I used thicker thicker wire. If you choose colored copper wire you should use nylon pliers that won't scratch the colored surface.
Fantasy Film is an iridescent film that comes in many different base colors. On top of that, some sellers name the colors differently.
When I purchase a new roll of film, I cut off a swatch and label the given color name in permanent ink. I store the swatch with the roll of film.
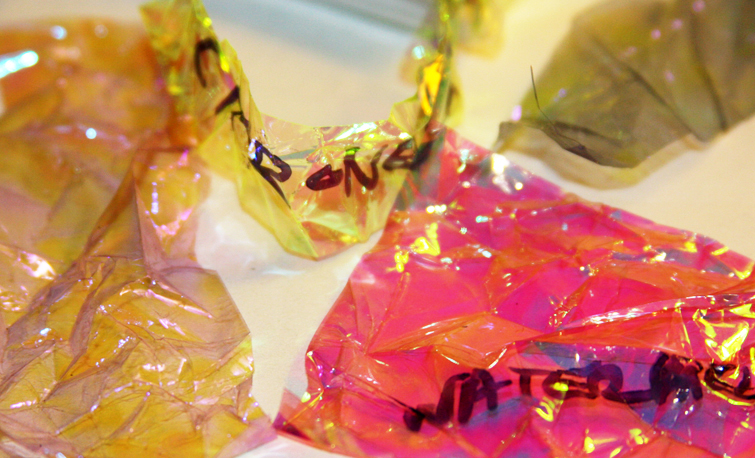
To get a better idea of how the iridescence will affect the overall color of the film, I also crumple the swatch. Heat will intensify the colors and bring out the iridescence even more.
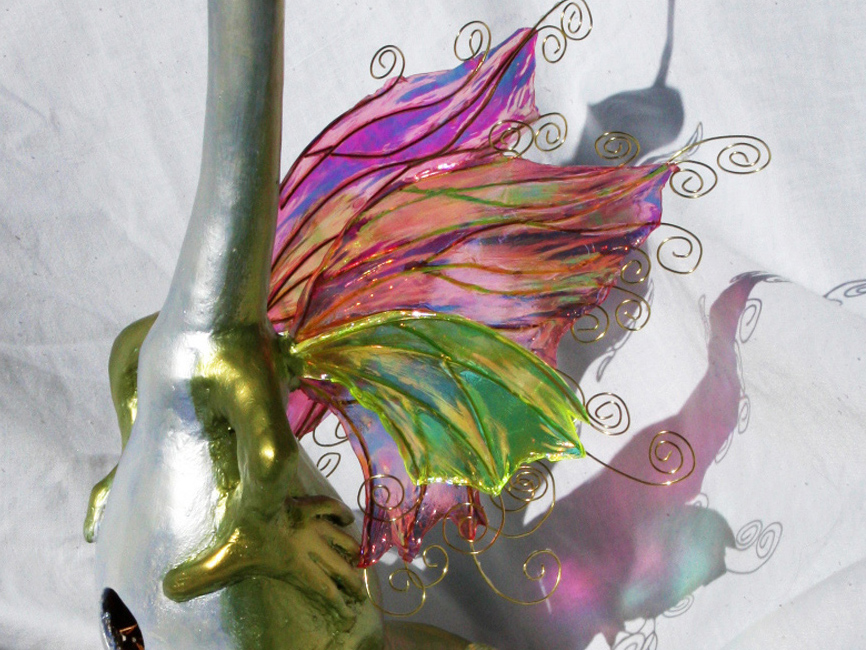
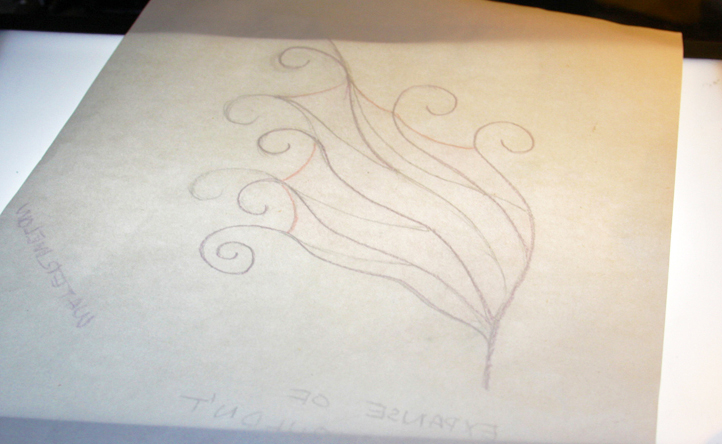
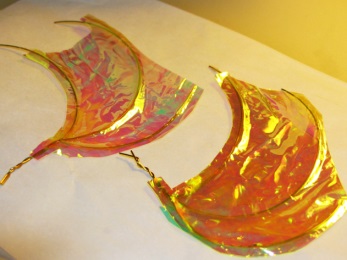
The pair of wings I designed for this particular dragon had three different sections each, and I used three different colors of Fantasy Film. So the wing sections and film colors will vary in the pictures for this tutorial.
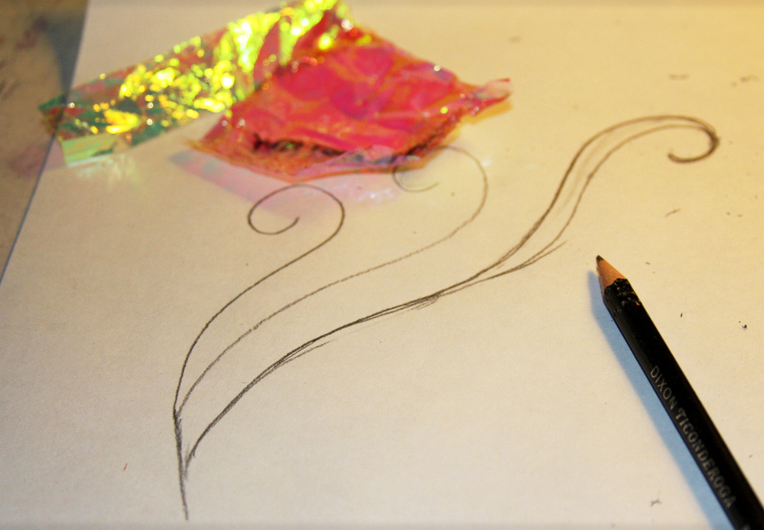
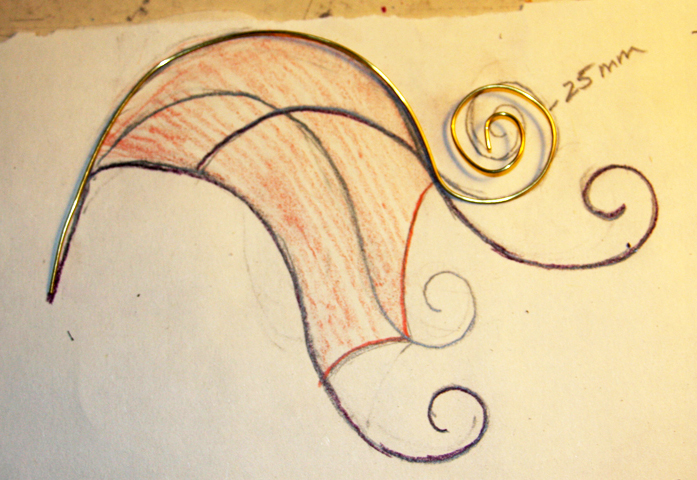
I began by just doodling flowing lines to get an idea of how I wanted the dragon's wings to be shaped. As well, I kept some color swatches nearby as I mulled over how the colors interacted.
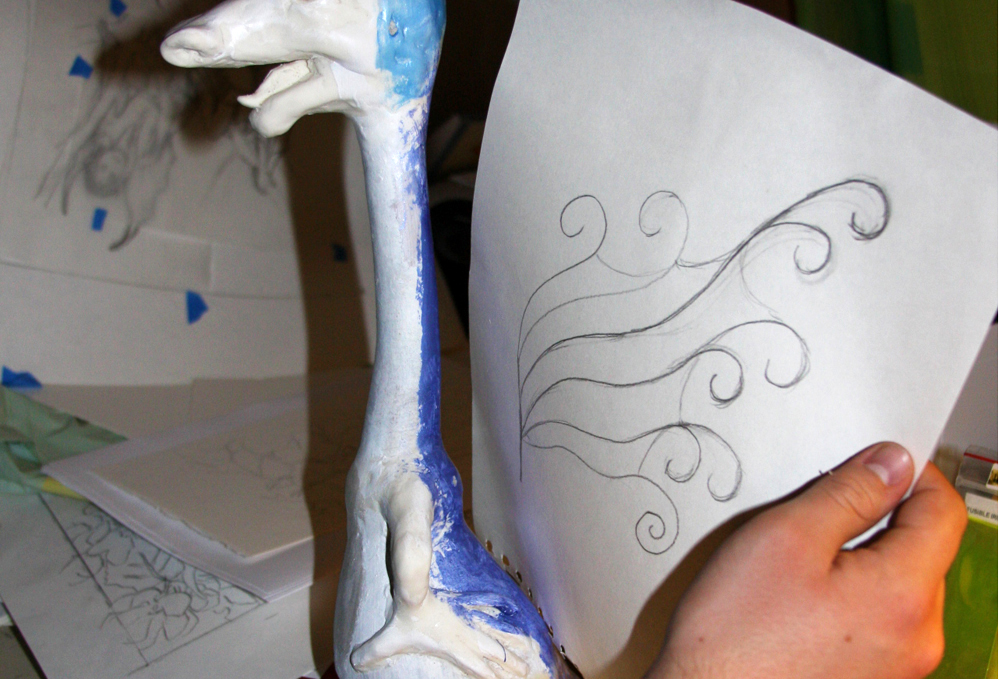
Now and then I held up the wing sketches to check on scale.

The rolls of Fantasy Film are 4" wide. The film needs to extend a bit beyond the wire support. So I made sure that the widest part of the wing wasn't more than 3-1/2".
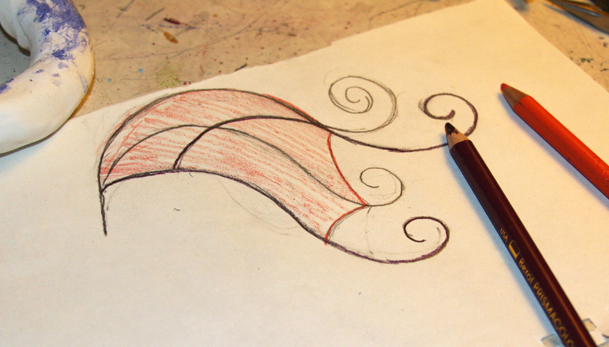
In my design, the wire ends extended beyond the transparent film. I colored in to indicate where the Fantasy Film would be applied.
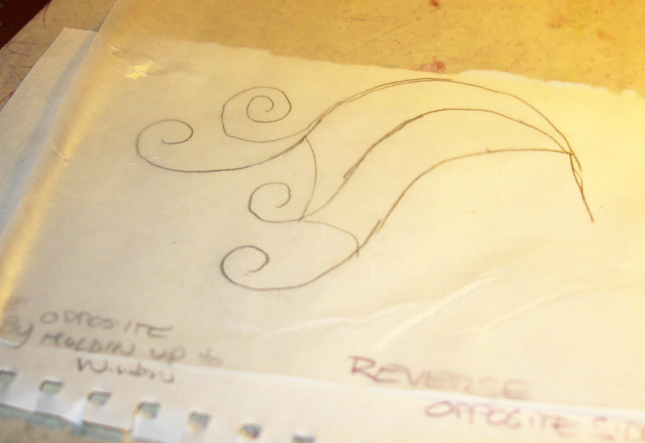
Each wing will have a "right" side and a "wrong" side. By tracing the pattern onto a piece of tracing paper, you can flip the pattern when you assemble the reverse wing.
If you don't have tracing paper, you can trace the reverse wing on the back side of your pattern on a light box or a window during daylight.
Shape the wire pieces directly over the pattern piece.
Write down the wire lengths as you form them. When you work on the opposite wing, you will already know what length to cut the wire.
The wires need to be kept in a single layer for the film to lay flat. Sometimes, lines of the design intersected, as in the pattern above. In a case such as that, choose one of the wires to cut into two sections and lay them on either side of the other wire.
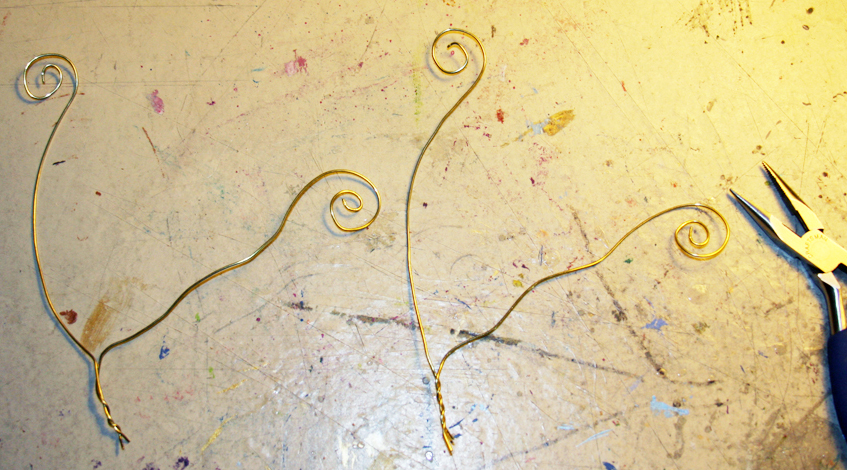
For better wing stability, have the top and bottom parts of the wing join together where the wings will be glued into the figure. Depending on how far into the figure you want to set the wings, you will need to add a bit to the length of the wires. Twist them tightly together.
For even more stable wings, make the top and bottom supports from a single wire. Decide how far into your dragon you will want to set the wings, and add double that. For example, if you want to sink the wires into your figure by an inch, add 2" to your piece of wire. Tightly twist the wire together where it will be glued into the dragon.
After twisting the ends of the wires, reform any misshapen curls or bends.

Once you've cut your wires, it's time to assemble the wings.
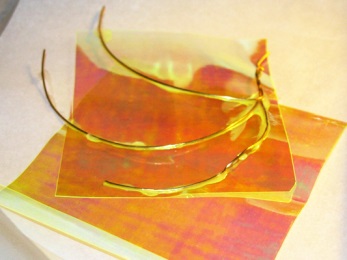
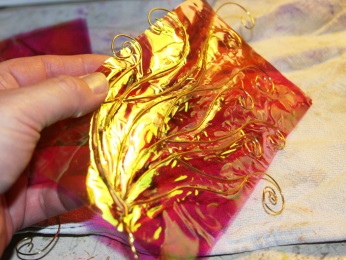
Cut a sheet of Fantasy Film that is large enough to cover the wing. The film needs to extend a bit beyond the outside edges of the wing.
Put the Fantasy Film over your pattern so that you can see where all the wire pieces will fit.
Take a wire piece and put glue along the side that will fit over the pattern. It may take a few tries to find the right amount of glue. You want the whole side of the wire to be glued so that it will be firmly attached to the film, but you don't want so much glue that it will spread over the transparent film.
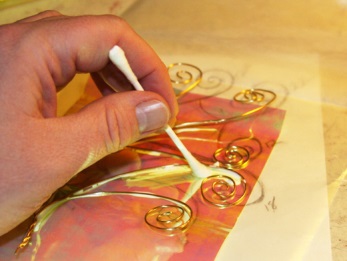
If you put down too little glue, you can add a bit after the wing has dried.
If you use too much glue, dab it up with a cotton swab before it dries. Too much glue may cloud the wing's transparency, or may prevent the film from shrinking evenly.
Before continuing to the next step, let the glue dry clear.
Using your pattern as a guide, trim the Fantasy Film. Don't trim the film too closely to the wires at the top and bottom. The film will shrink as it is heated, and can pull off the wires if trimmed too closely.
Take your time with an intricate wing. It's better to be careful with gluing and trimming that to have to start over again
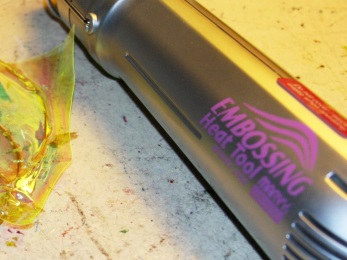
You can use a hair dryer for shrinking the film over the wings, but an embossing heat tool will give you more control.
Once you have warmed up the embossing tool, experiment with how close you need to bring the tool to the wing before the film starts shrinking.

The film thickens and hardens as it is heated, and the colors intensify.
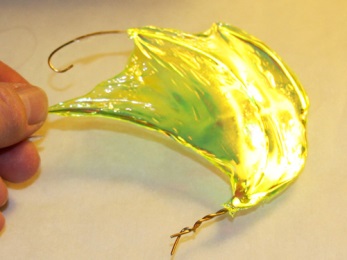
Position your heating tool so that it is facing downward over the film side of the wings. The heat will shrink the film so it curls down over the wires, making a smoother edge.
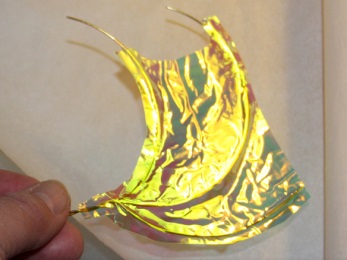
If the film breaks away from the wires while you are shrinking the wings, there either wasn't enough glue, or the glue didn't adhere correctly. In that case, you can pull off the film and glue, and reuse the wires for a second try.
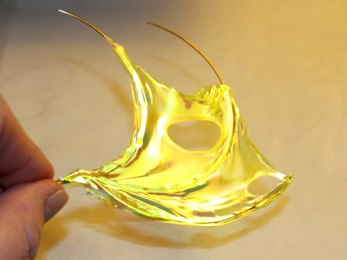
If holes start forming in the film, the film has shrunk so much there isn't enough of it left to fill between the wires. Depending on your openness to happy accidents, this may or may not be a problem. Many artists intentionally burn holes into their fairy wings. The challenge is to burn matching holes in the facing wing.
If holey wings just don't seem right for your project, either pull off the glue and film to use the wires for a second try, or put the wings aside for another project.
.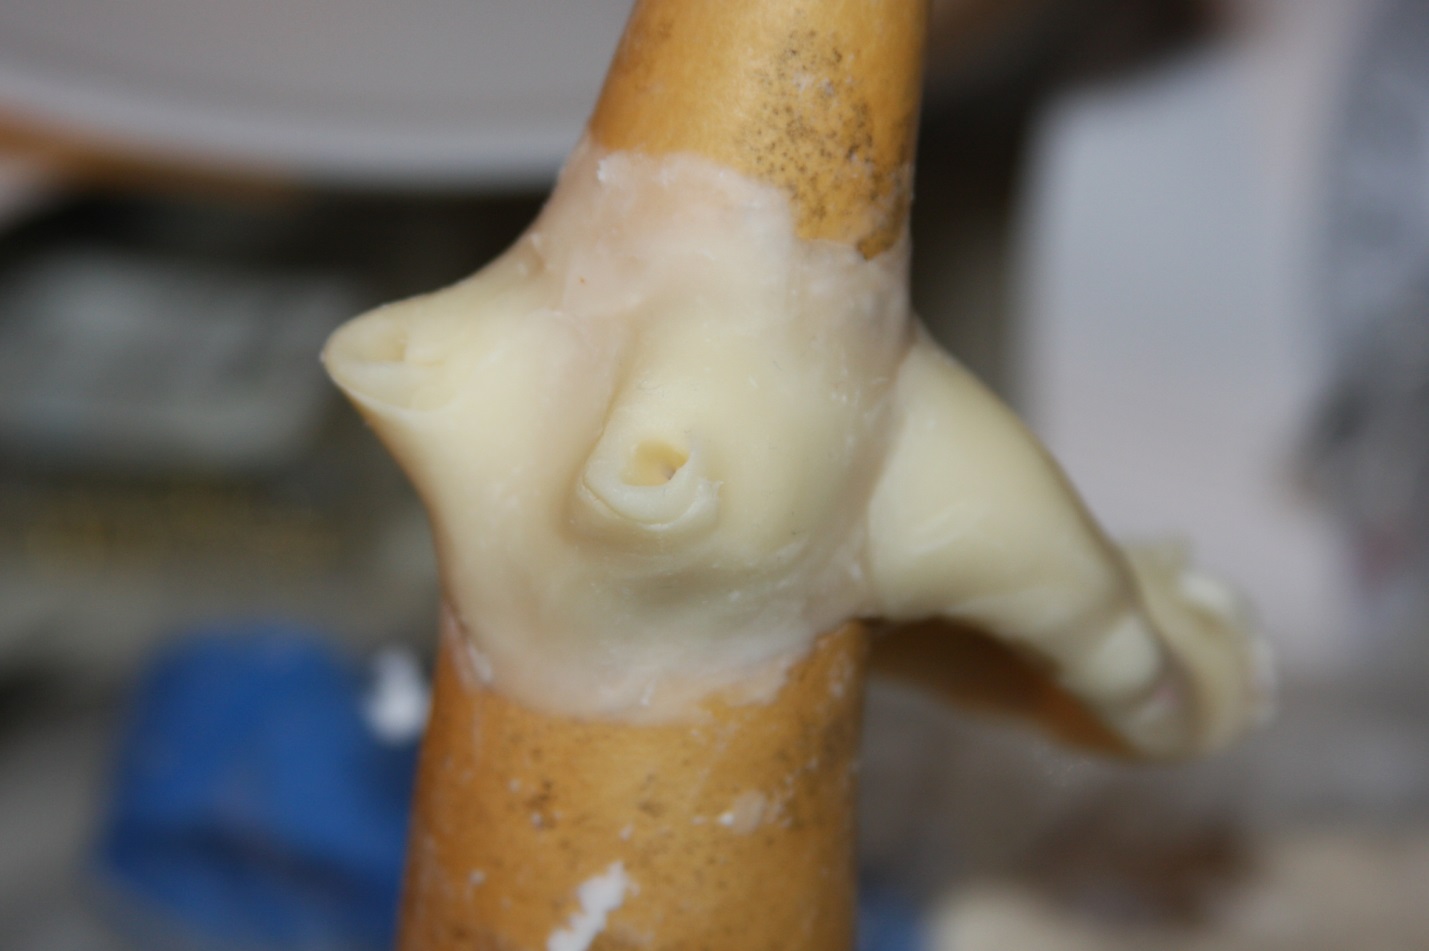
For lighter weight gourds, or gourds with thin shells, it helps to build a clay support to hold up the wings. Attach cones of clay on the dragon's back. While the clay is still pliable, poke sockets into the cones with the same gauge wire as you are using for the wings.
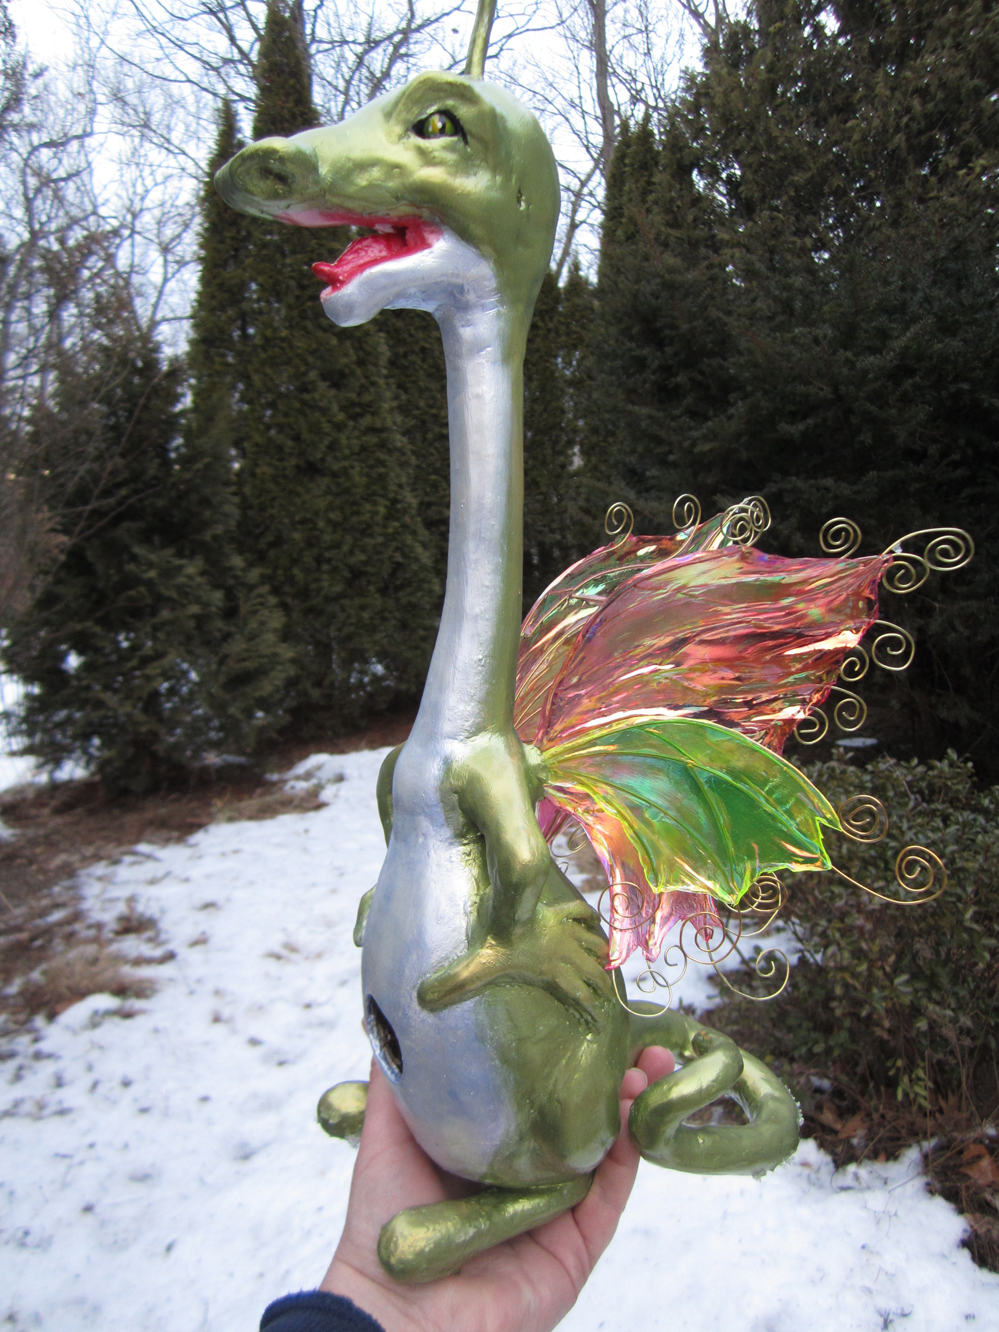
The dragon I was making wings for in this tutorial had a very thick gourd shell, so I didn't need to make clay supports.
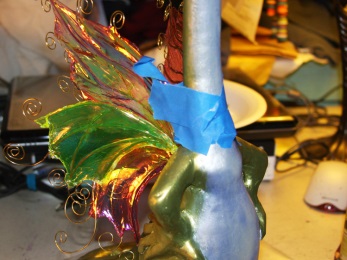
Instead, I drilled holes in his back, squirted glue inside, then pushed in the twisted wing ends. I used painters tape to support the wings as the glue dried.
(You many notice that in one of the pictures above this dragon was painted with blue and purple patches. I decided to make the dragon's body green to visually tie it in with the yellow/green wing sections.
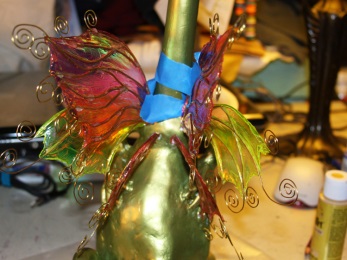
This view of the dragon gourd shows the position of the wing sections from the back.